BIDS GUIs: Difference between revisions
| Line 23: | Line 23: | ||
This will read all trigger lines (analog and digital) and populate lines <br> |
This will read all trigger lines (analog and digital) and populate lines <br> |
||
The triggers can be evaluated on upgoing or downgoing portions of the trigger squarewave <br> |
The triggers can be evaluated on upgoing or downgoing portions of the trigger squarewave <br> |
||
[[File:Trigger_gui_initial_loading.png | |
[[File:Trigger_gui_initial_loading.png | 900px]] <br><br> |
||
Name all of the appropriate trigger lines (digital and analogue codes) <br> |
Name all of the appropriate trigger lines (digital and analogue codes) <br> |
||
Hitting the '''Update Event Names''' button to access the derivative event menu. You can now make events from other events. <br> |
Hitting the '''Update Event Names''' button to access the derivative event menu. You can now make events from other events. <br> |
||
Revision as of 10:54, 28 January 2025
What is BIDS
https://bids-specification.readthedocs.io/en/stable/
BIDS is a standard specification for neuroimaging/physiology data. This currently includes at least: MRI, fMRI, DTI, EEG, MEG, fNIRS (and possibly ECOG/sEEG). BIDS typically describes how RAW data is organized - and processed data is located in the bids_dir/derivatives/{AnalysisPackage}/{SUBJECT}/... The main advantage is that common code can be generated to process data organized in a standard format. Therefore, you should be able to import the bids data into any number of neurophysiological packages (MNE, Brainstorm, SPM, Fieldtrip, ...). Additionally, standardized processing packages known as BIDS apps can be used to process the data in the same way as long as the data is organized in BIDS.
Biowulf Setup
https://megcore.nih.gov/index.php/MEG_Biowulf_Setup
On Biowulf
Log into biowulf using NoMachine. Setup instructions here: https://hpc.nih.gov/docs/nx.html
NOTE: Remember to change the resolution to be close to your monitor (top right corner)
On biowulf open a terminal and start a compute node using the commands below
sinteractive --mem=24G --cpus-per-task=4 --gres=lscratch:50 #adjust mem and cpus accordingly
module use --append /data/MEGmodules/modulefiles
module load mne/dev1.5.1
Prep Data for BIDS
Add event coding to the datasets before converting to bids
Open a dataset:
This will read all trigger lines (analog and digital) and populate lines
The triggers can be evaluated on upgoing or downgoing portions of the trigger squarewave

Name all of the appropriate trigger lines (digital and analogue codes)
Hitting the Update Event Names button to access the derivative event menu. You can now make events from other events.
DO NOT EDIT THE TOP PANEL AFTER HITTING THIS BUTTON
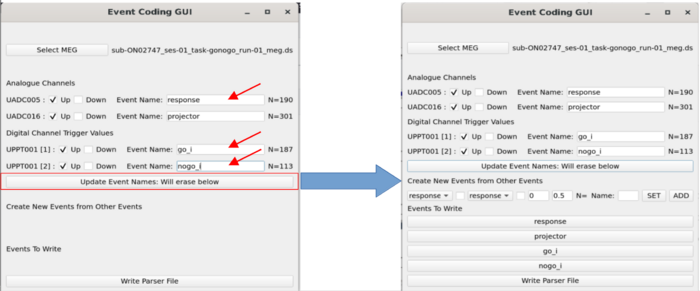
The derivative event panel allows you to make new events from other events.
Select a lead event from the dropdown (the menu will display any events that have been established above the current line)
Select a lag event from the dropdown
Click the checkbox next to the event that should establish the timing.
Enter the window to search from the lead event (this can include negative numbers in the initial entry)
Enter the name that the new derivative event will be called.
Click the ADD button. This will add a new line and add this event to the dropdown list and the keep events panel at the bottom

Anything not named cannot be used below to parse two input codes or to save out to the MarkerFile.mrk event code file
Once finished coding the events - the bottom panel determines which events are written to the Markerfile - intermediary events not selected will be ignored
D-prime coding is often used (Hit, Miss, False Alarm, Correct Rejection)
Click create script to generate a script that can be used for all subjects under this protocol

Create BIDS Dataset Using GUI
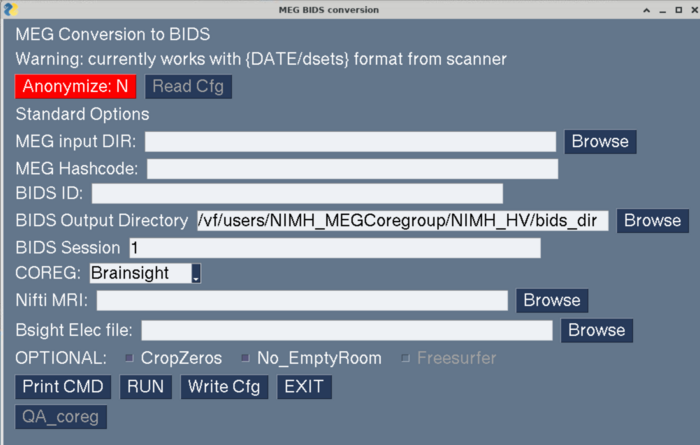
https://megcore.nih.gov/MEG/BIDS_gui_080224_anon.pdf
make_meg_bids_gui.py
QA GUI Overview
Launch the QA gui
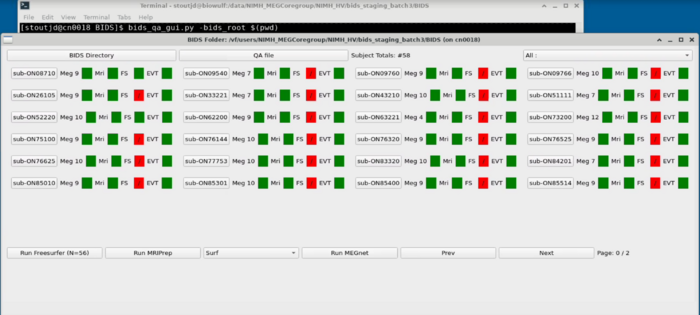
bids_qa_gui.py -bids_root <<PATH to BIDS dir>>
Project Panel
The project panel consists of tiles with each subject ID.
Subject ID Button:
- Meg: Number of MEG files
- Mri: If they have an MRI
- FS: Has the freesurfer been run and is successful
- EVT: Events pass QA (Currently this is just green and doesn't QA)
QA File:
Set the appropriate number of events in a successful meg dataset
Top Right Dropdown:
Filter for specific tasks - this will adjust the color coding on the MEG
Run Freesurfer Button:
Submits freesurfer sbatch job to biowulf for each missing subject with an mri
Run MEGnet:
Currently a placeholder
Prev/Next:
Advance to the next panel if more than a single grid of subjects is available
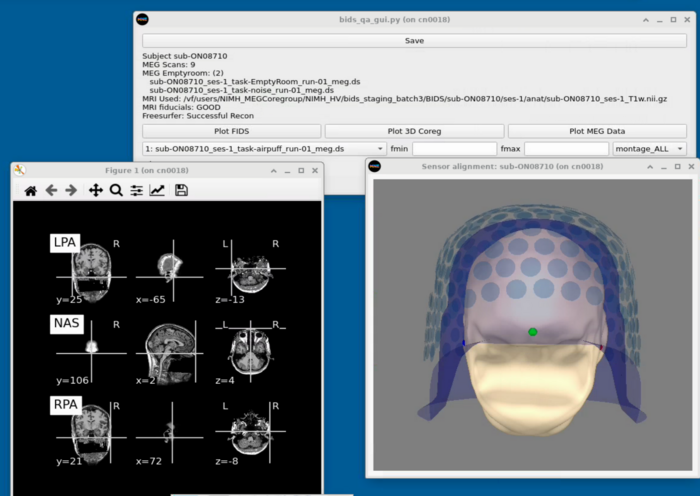
Subject Panel
Task Switcher
Changing the task - shows the number of epochs in the selected task
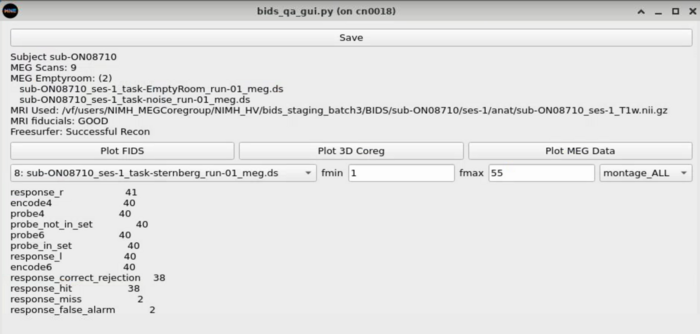
MRI Viewing
MEG Plotting
Dropdown with MEG plotting options

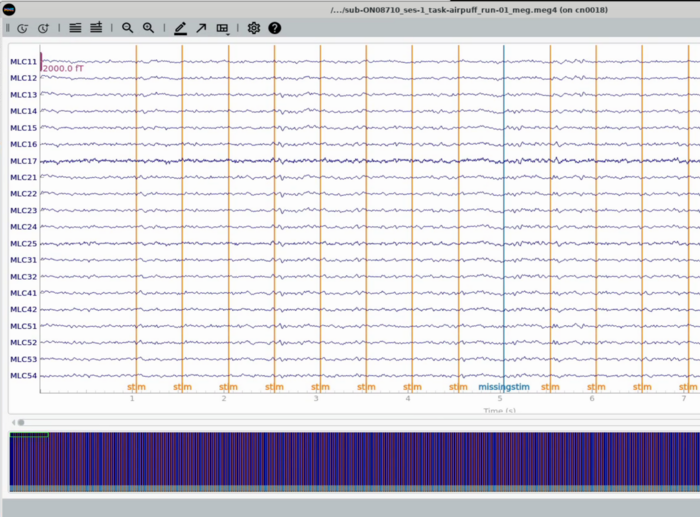
Plot All MEG channels (unorganized view of All channels)
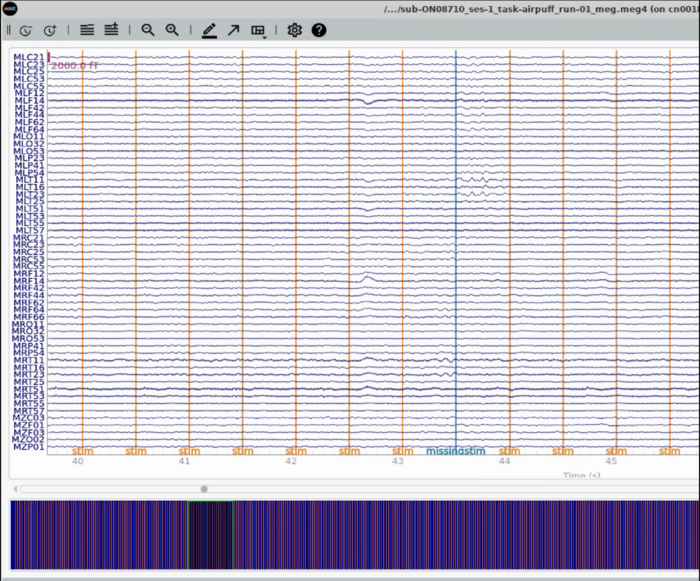
Plot whole head - subset of meg channels representing the Left (top half) to Right (bottom half) display
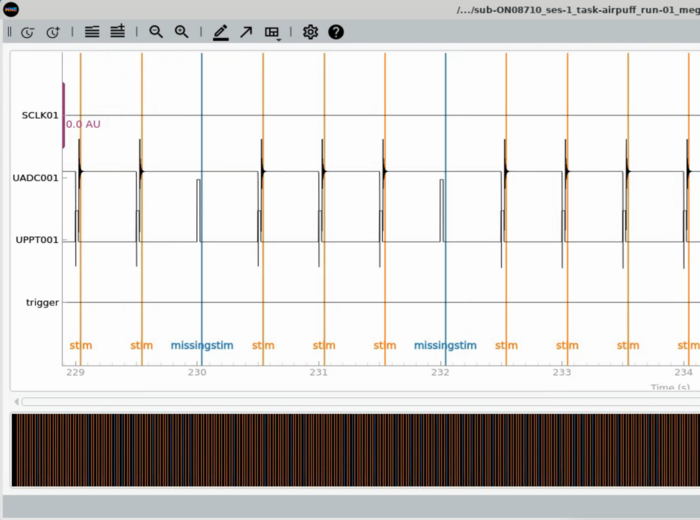
Plot Trigger Channels
Note the auditory delay added to the triggerline pulse
Setting BAD Channels and BAD Epochs (Must do WriteBads afterwards)
1) Plot a dataset (montage56 is preferable) with a wide bandwidth filter fmin=0.5 and fmax=110. The notch should be checked
2) BAD Epochs: Click on "Add Description" >> Set the name. The name must start with BAD_ or it will not be written.
3) Left click and drag to set a bad time period.

4) Clicking on a channel will set it to grey. This sets the channel to BAD (!!Warning it is easy to accidentally do this!!).
5) After closing the plot, you can then click the write Bad Channels and Bad Epochs.


