ENIGMA MEG data upload: Difference between revisions
| Line 35: | Line 35: | ||
=Data upload process= |
=Data upload process= |
||
''' |
<big>'''* DATA MUST BE ANONYMIZED BEFORE UPLOAD! *'''</big> |
||
<br><br> |
<br><br> |
||
''' |
*'''Log into the Globus website to view main menu''' |
||
<br> |
<br> |
||
[[File:GlobusMainMenu.png| 900px | Alt text]] |
[[File:GlobusMainMenu.png| 900px | Alt text]] |
||
<br><br> |
<br><br> |
||
''' |
*'''Find remote endpoint - Click the search field''' |
||
<br> |
<br> |
||
[[File:GlobusSearch.png| 900px | Alt text]] |
[[File:GlobusSearch.png| 900px | Alt text]] |
||
<br><br> |
<br><br> |
||
''' |
*'''Select Remote Endpoint provided over email - Go to the "Your Collections" or "Shared With You" tab''' |
||
<br> |
<br> |
||
[[File:GlobusSelectEndpoint.png | 900px | Alt text]] |
[[File:GlobusSelectEndpoint.png | 900px | Alt text]] |
||
<br><br> |
<br><br> |
||
''' |
*'''Connected to Remote Endpoint - View Contents and select folder (It is possible that the folder is empty) ''' |
||
<br> |
<br> |
||
[[File:GlobusConnectRemote.png | 900px | Alt text]] |
[[File:GlobusConnectRemote.png | 900px | Alt text]] |
||
<br><br> |
<br><br> |
||
''' |
*'''Start Globus Connect Personal on your computer to interact with local files/folders. |
||
<br>If no collection available - see next section to create endpoint''' |
<br>If no collection available - see next section to create endpoint''' |
||
<br> |
<br> |
||
| Line 63: | Line 63: | ||
<br><br> |
<br><br> |
||
''' |
*'''Create a local endpoint (on your computer)''' |
||
<br> |
<br> |
||
[[File:GlobusCreateLocalEndpoint.png |900px | Alt text]] |
[[File:GlobusCreateLocalEndpoint.png |900px | Alt text]] |
||
<br><br> |
<br><br> |
||
''' |
*'''Navigate Local Path. Select Data. Hit Start to initiate upload''' |
||
<br> |
<br> |
||
[[File:GlobusLocalDataSearchForUpload.png |900px | Alt text]] |
[[File:GlobusLocalDataSearchForUpload.png |900px | Alt text]] |
||
<br><br> |
<br><br> |
||
''' |
*'''Visualize Ongoing Activity ''' |
||
<br> |
<br> |
||
[[File:GlobusVisualizeOngoingActivity.png |900px | Alt text]] |
[[File:GlobusVisualizeOngoingActivity.png |900px | Alt text]] |
||
<br><br> |
<br><br> |
||
''' |
*'''After completion: Globus upload details and email of successful transfer''' |
||
<br> |
<br> |
||
[[File:GlobusUploadConfirmation.png |900px | Alt text]] |
[[File:GlobusUploadConfirmation.png |900px | Alt text]] |
||
Revision as of 12:06, 26 February 2021
Steps prior to data upload
(if data is already anonymized+bids format skip this section)
- Anonymize MEG data
- Anonymize and deface MRI (options below)
- Freesurfer: mri_deface : https://surfer.nmr.mgh.harvard.edu/fswiki/mri_deface
- Pydeface: pydeface : https://github.com/poldracklab/pydeface
- SPM: spm_deface : https://www.fil.ion.ucl.ac.uk/spm/software/spm12/
- Brainstorm : MRI (right click) > Deface Volume : https://neuroimage.usc.edu/brainstorm/Introduction
- Fieldtrip: ft_defacevolume: https://www.fieldtriptoolbox.org/reference/ft_defacevolume
- Afni: @afni_refacer_run : https://afni.nimh.nih.gov/pub/dist/doc/htmldoc/tutorials/refacer/refacer_run.html
- Brainvoyager: : https://download.brainvoyager.com/bv/doc/UsersGuide/GettingStarted/AnonymizationAndDefacing.html
- Confirm defacing algorithm prior to upload using an MR viewer (many options above)
- Datasets for upload
- MEG resting state
- MEG emptyroom
- MEG/MRI Transformation matrix (or locations of head coils in MRI coordinates). Provided MRI must match transform or coil locations.
- MNE python (-trans.fif)
- Brainstorm
- SPM
- Fieldtrip
- Vendor transform (Still to be determined if this is acceptable)
- Coded subject list with age, gender, and other demographics (TBD)
Globus Website
Data to be included in the Enigma MEG mega-analysis and data harmonization procedure will be uploaded using the Globus software. Globus is a secure, fault-tolerant, peer-to-peer software based on GridFTP. Secure control signals are communicated with the Globus website, but data transfer is only performed between endpoints (peer-to-peer).
An endpoint per lab will be created on NIH storage and given access credentials via email. Only users within your lab and the NIH MEG Core will be able to view and write data in the provided endpoint. Once you receive an email from globus connecting you to a globus endpoint, you will need to create an account on the globus website associated with your institution.
 The globus website will allow you to see the upload endpoint
 https://www.globus.org/
Required Software to see local data
 Globus connect personal is used to browse local data for upload.
 https://www.globus.org/globus-connect-personal
Data upload process
* DATA MUST BE ANONYMIZED BEFORE UPLOAD! *
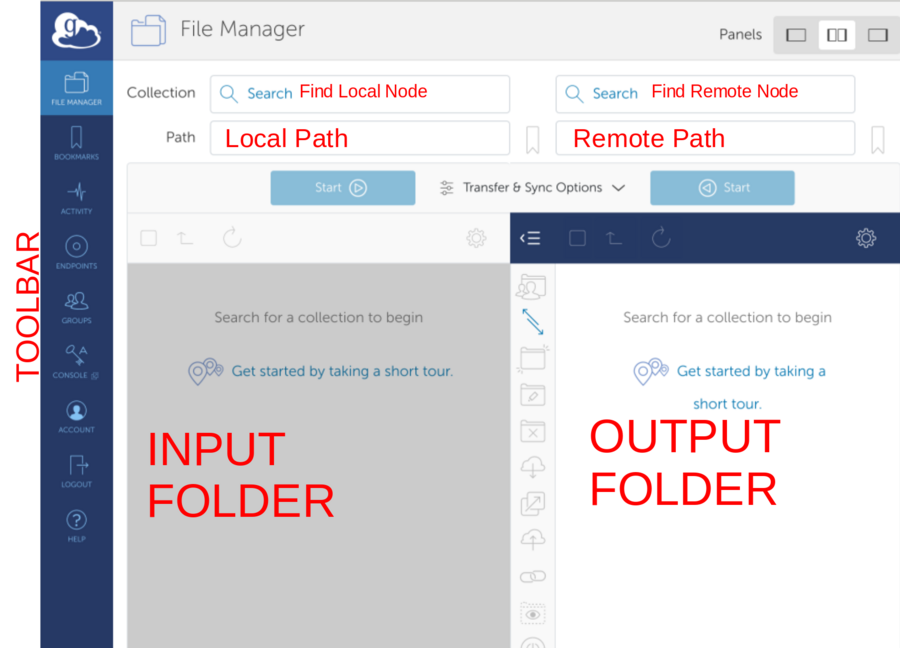
- Log into the Globus website to view main menu
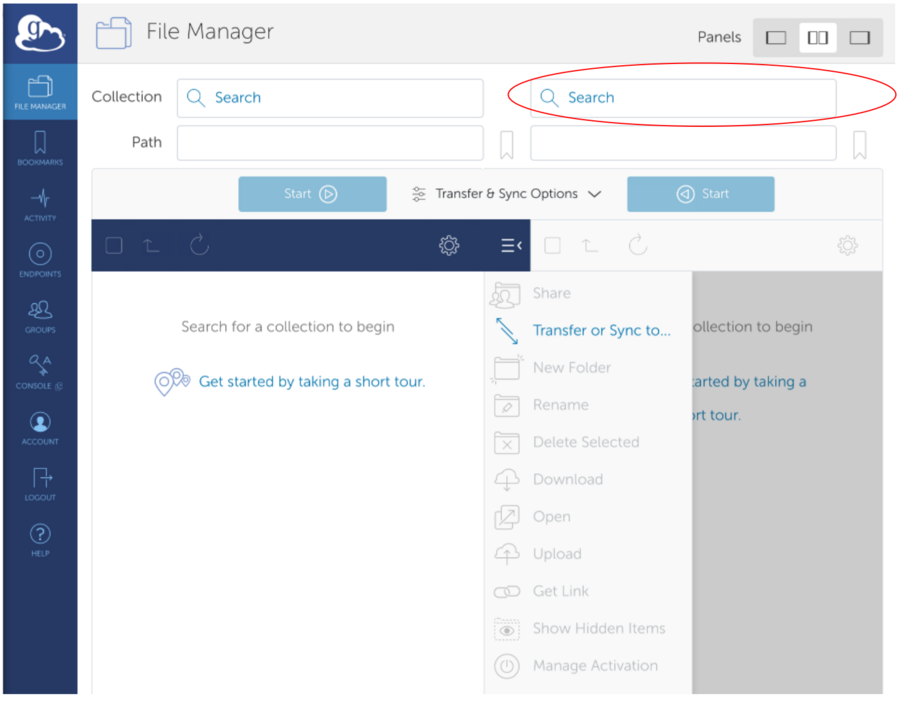
- Find remote endpoint - Click the search field
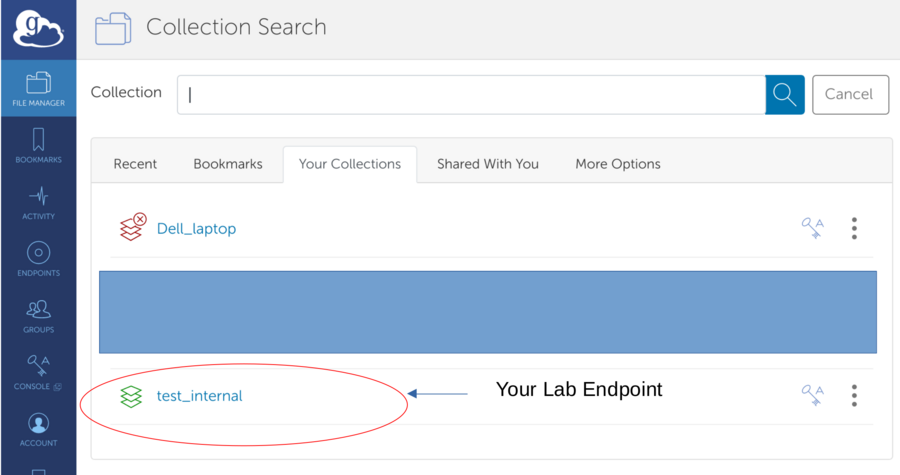
- Select Remote Endpoint provided over email - Go to the "Your Collections" or "Shared With You" tab
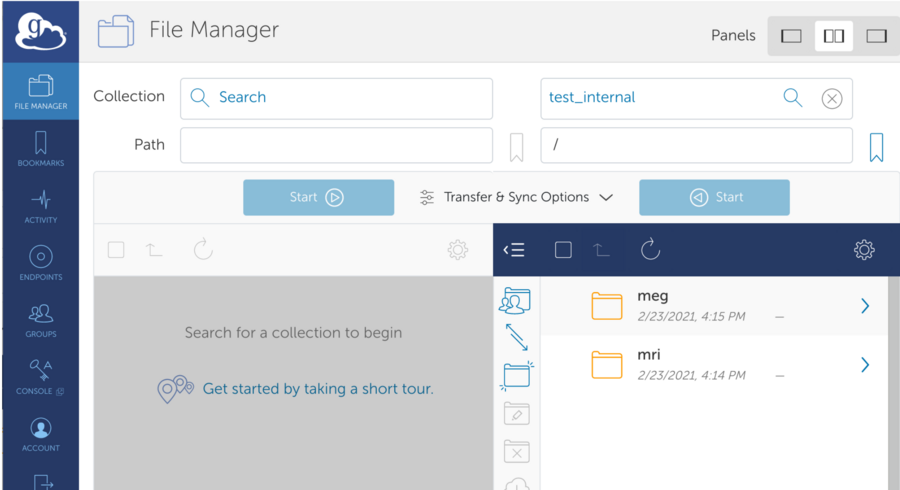
- Connected to Remote Endpoint - View Contents and select folder (It is possible that the folder is empty)
- Start Globus Connect Personal on your computer to interact with local files/folders.
If no collection available - see next section to create endpoint
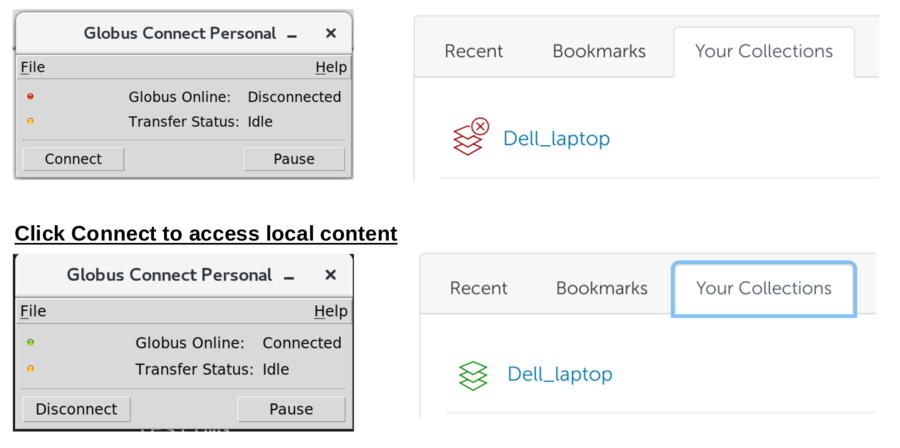
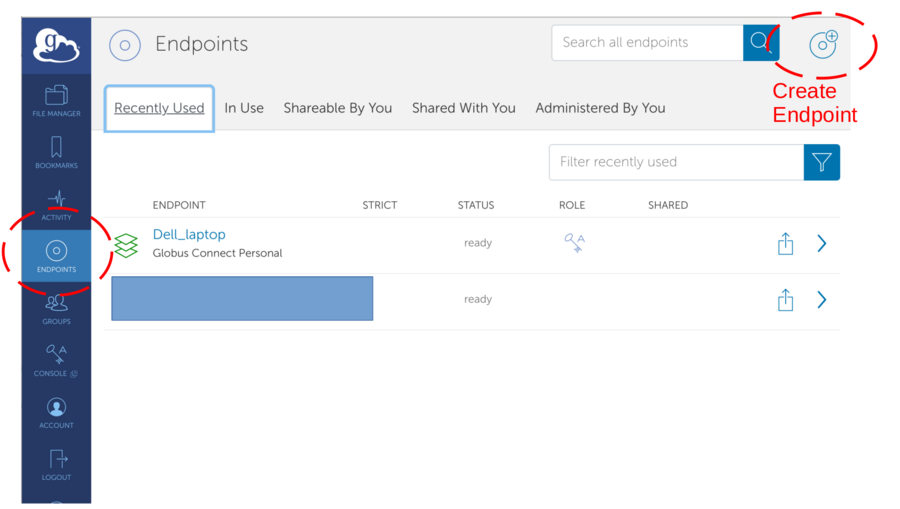
- Create a local endpoint (on your computer)
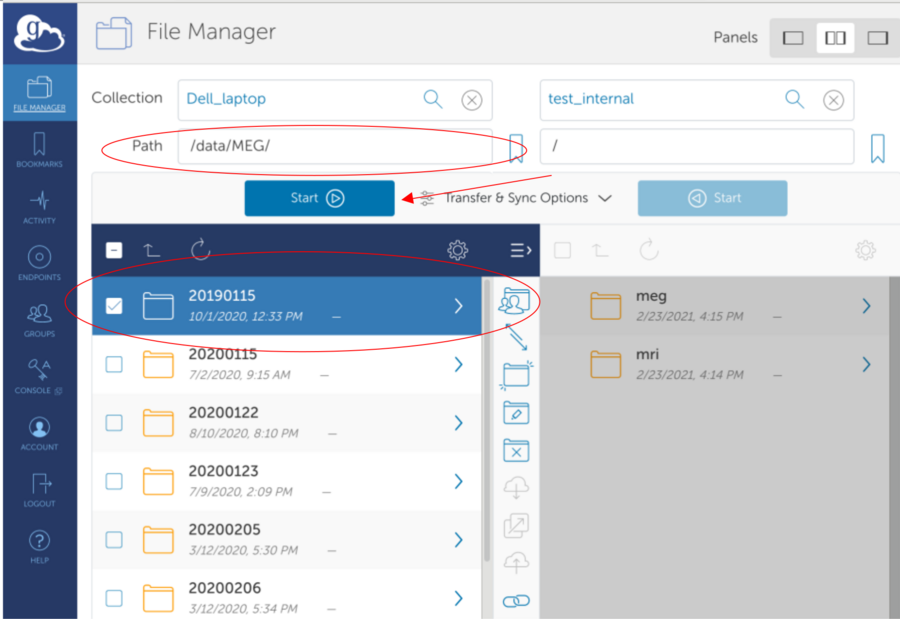
- Navigate Local Path. Select Data. Hit Start to initiate upload
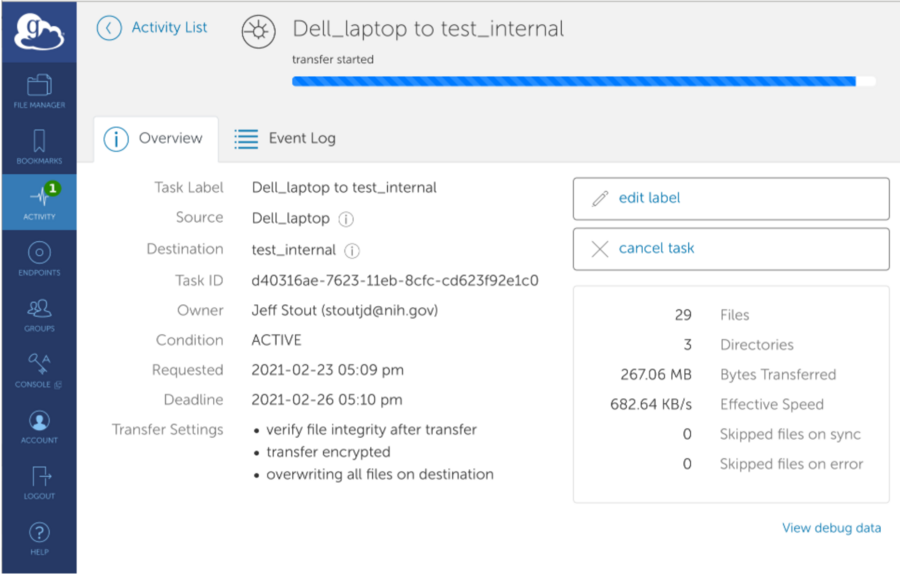
- Visualize Ongoing Activity
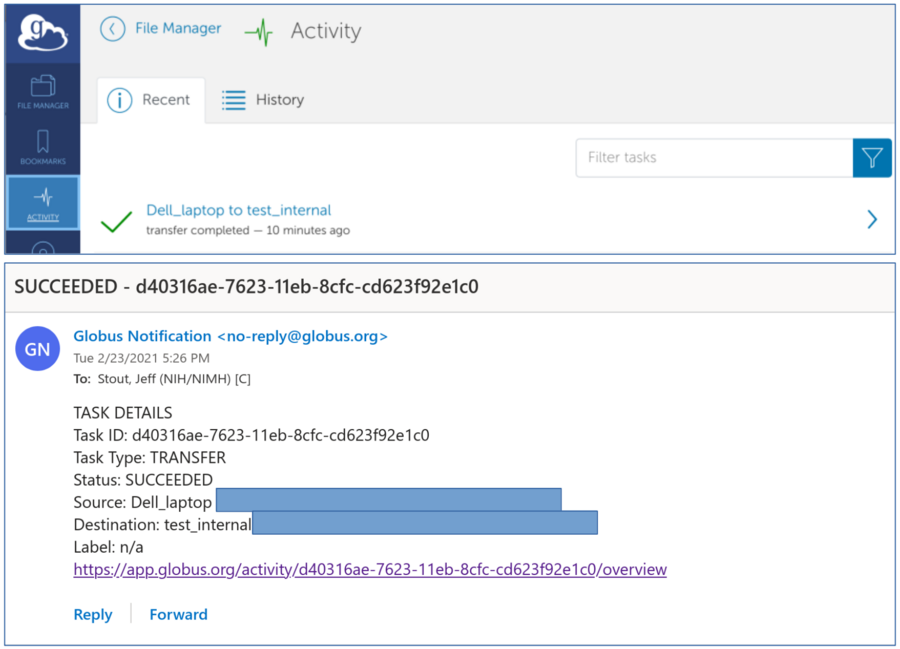
- After completion: Globus upload details and email of successful transfer
